
In this Article we learn how to claim mivi warranty, Track your ticket, Mivi warranty registration for all Mivi product. In the present speedy world, where technology evolves rapidly, investing in high-quality electronic gadgets is a common practice.
One brand that has gained significant popularity for its audio and mobile accessories is Mivi. Notwithstanding, similar to every electronic gadget, Mivi items can once in a while experience gives that require guarantee claims. In this far reaching guide, we will walk you through the most common way of making a Mivi guarantee on the web, it is safeguarded to guarantee that your venture.
What is Mivi Warranty Claim Online Process Policy
Mivi normally offers a one-year guarantee or replacement on a large portion of its items. However, guarantee terms and lengths might differ by item. It’s essential to check the specific warranty details for your product on the Mivi website or the product packaging.
How to Claim Mivi Warranty for all Mivi Product
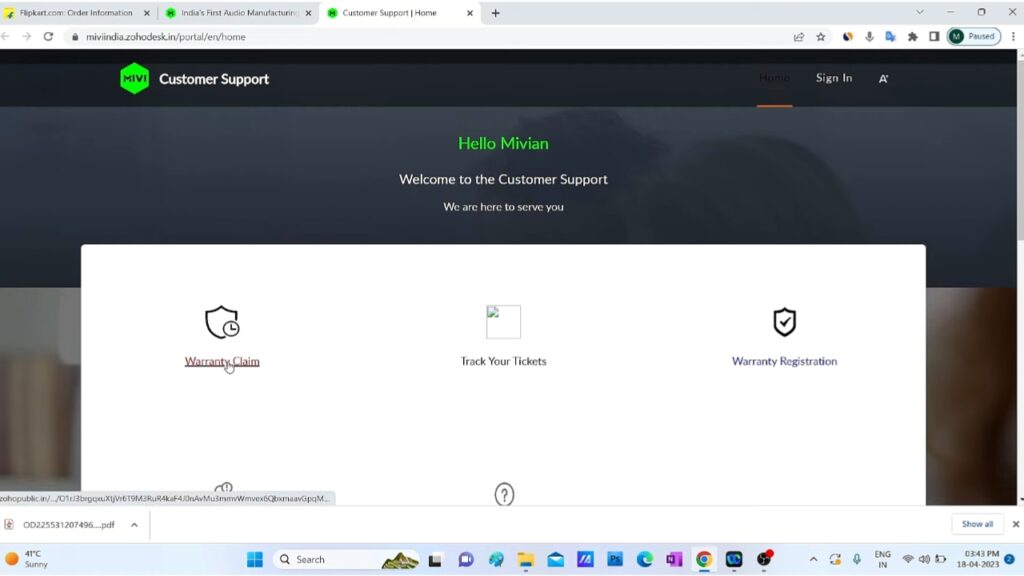
In this article, we will learn how to claim Mivi warranty for any Mivi product, visit the official Mivi website at https://miviindia.zohodesk.in/portal/en/home and navigate to the “Home” section. From there, you can access the “Customer Support” section, where you should click on “Warranty Claim.” Follow the provided instructions to submit your warranty claim, ensuring you have the necessary proof of purchase and product details. Once submitted, await confirmation and follow any additional instructions provided. Keep in mind that the warranty process may slightly vary depending on the specific product and your location, so it’s advisable to refer to Mivi’s official website for the most accurate and up-to-date information.
A Step by Step Guide to Claim warranty of Mivi earphones
If you’re wondering, “How to claim Mivi Warranty,” we’ve got you covered with a simple 10-step guide. Commencing with product registration, we stress the significance of this initial step
Step 1. Visit the Official Mivi Website:
Go to the official Mivi website at https://miviindia.zohodesk.in/portal/en/home.
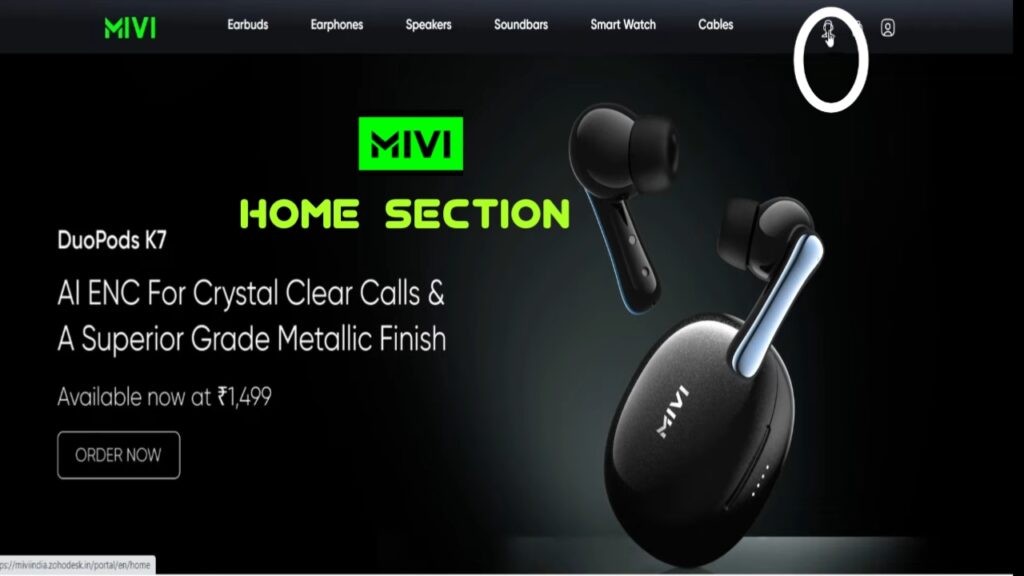
Step 2. Navigate to the “Home” Section:
Once on the website, navigate to the “Home” section. This is usually found on the main page or in the website’s header and right corner of the page.
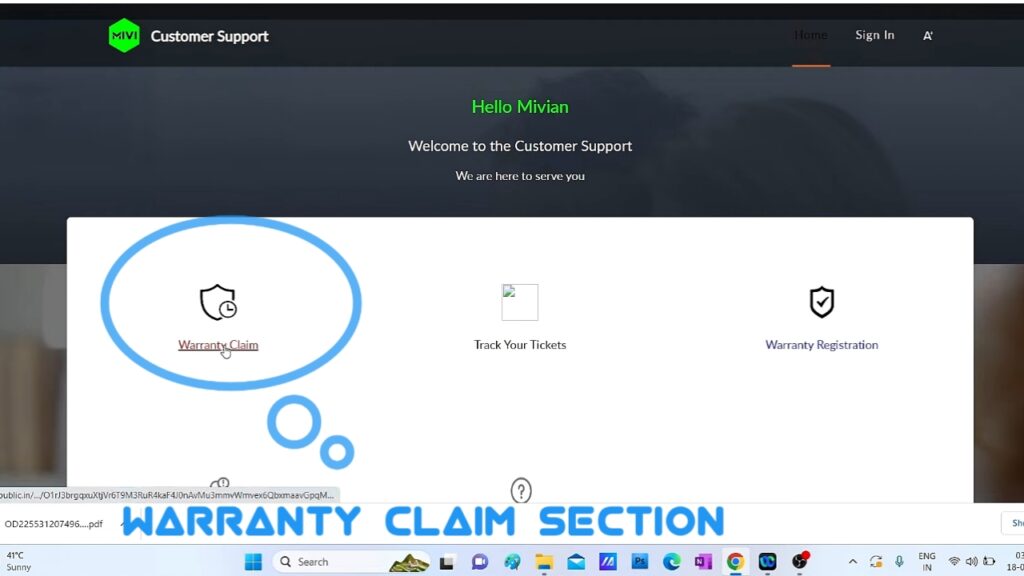
Step 3. Click on “Warranty Claim”:
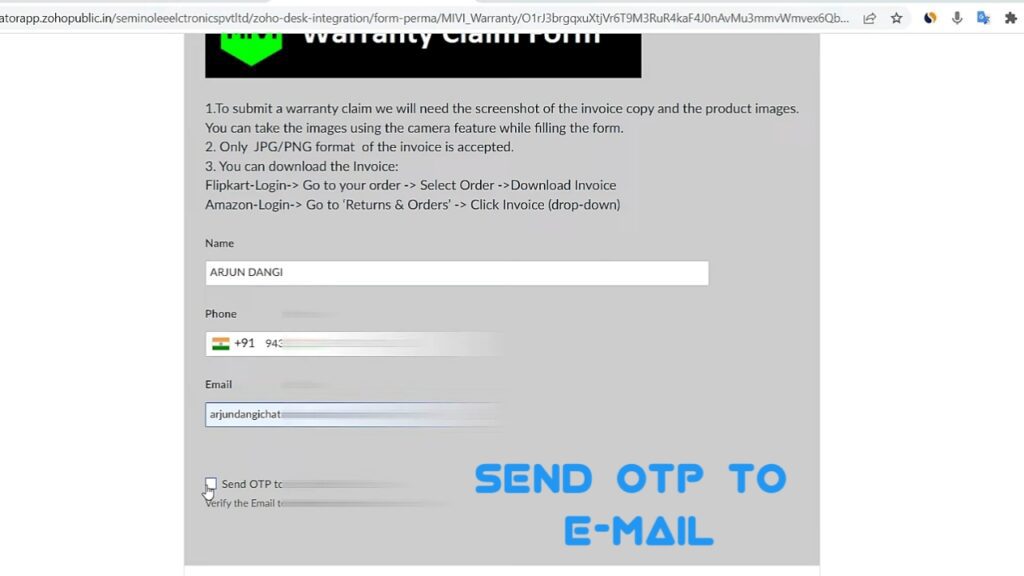
After clicking on “Warranty Claim,” locate the “Warranty Claim Form.” This form is where you will need to provide accurate information such as your name including your phone number and email address.
Step 4. Click on “Send OTP to Email”
Upon completing the warranty claim form with your accurate information, the next step is usually to click on the option to send an OTP (One-Time Password) to your provided email address.
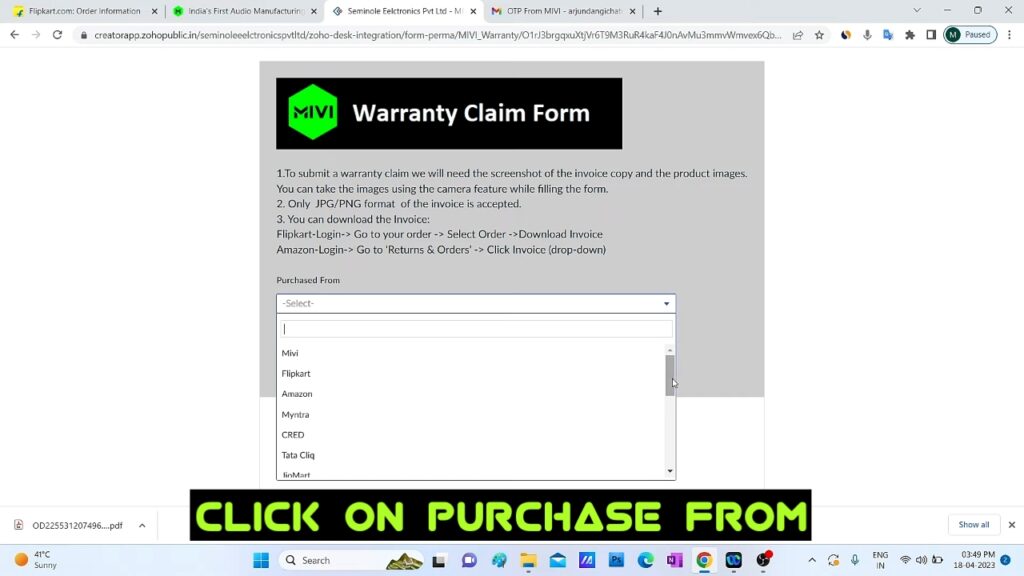
Step 5. Click on “Purchase from” Section:
After successfully submitting the OTP, you will be directed to the next page in the warranty claim process, which typically includes a “Purchase From” section. In this section, you’ll need to specify where you purchased the Mivi product, whether it was directly from Mivi’s official website, an authorized retailer, or another source. Providing this information helps Mivi verify the product’s authenticity and assists in the warranty validation process.
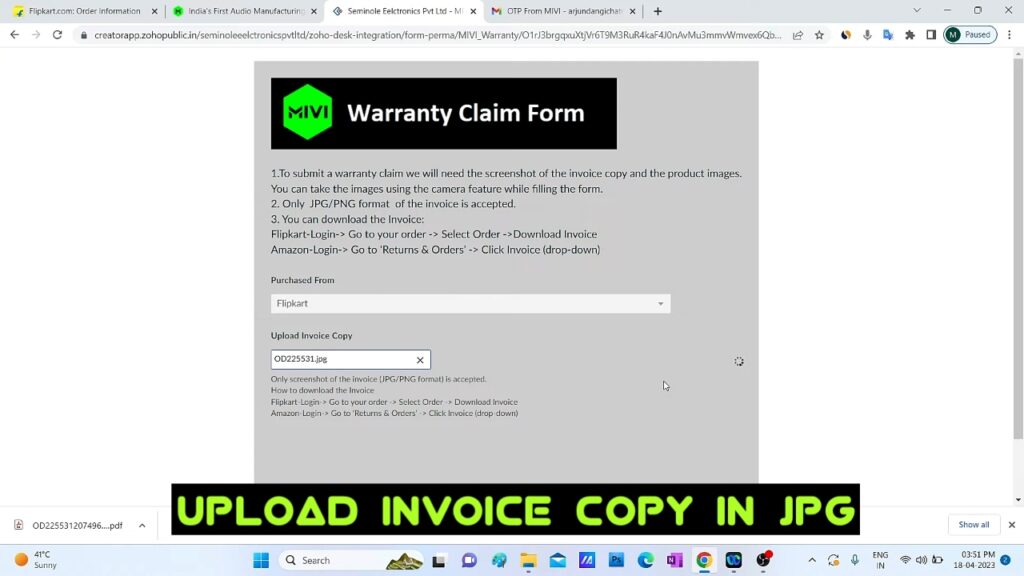
Step 6. Click on “Upload Invoice Copy” Section:
In the subsequent step “Upload Invoice Copy”, if your product invoice is available only in PDF format and you need to provide it in JPG format, you may need to convert the PDF file to JPG and You have an additional option to capture a screenshot of the invoice, and it can only be saved as a JPG file on any device. To do this, you can typically download the product invoice from various sources such as retailer websites like Flipkart, Amazon, Croma, or the official Mivi website. Once you have the PDF invoice file, you can use online converters or software tools to convert it into a JPG file format before uploading it as part of your warranty claim submission. This step ensures that your documentation aligns with the submission requirements.
Step 7. Choose Product Describe Your Issue:
I have encountered a problem with the product I purchased, specifically with one of the earphones. The issue is that either the left or right side earphone is not working properly. When I use the product, I’m only getting sound from one side, while the other side remains silent. I have tried troubleshooting, but the problem persists, significantly impacting my audio experience. For future reference and efficient communication with Mivi product support, write your my name, and write Your Email Address. I would appreciate assistance in resolving this issue promptly.
Step 8. Take Product image:
Using pictures, describe the product. Show the charging point first, then the earbuds within their charging case, the standalone earbuds, and many interesting angles from all around. Additionally, highlight the process for customers to claim their Mivi product, ensuring they have access to support and assistance when needed.
Step 9. Make Video of the Issue
To ensure a seamless mivi warranty claim online process, create a clear and well-lit video that showcases the issue you’re experiencing with your product. Be concise in your explanation, demonstrate the problem, and provide any relevant details. Remember to follow the provided instructions for uploading the video and reach out to Mivi’s customer support if you need assistance along the way.
Step 10. Final Step
In the last step, there is a question asked by the Mivi product: “Did the troubleshooting step resolve your issue?” Respond with “NO.” Before submitting your claim, you should click on the checkbox that says, “I acknowledge that all information is correct and proceed with the claim request.”
Step 11. Submitting Claim Confirmation:
After submitting the claim, a confirmation popup message will appear, indicating that your request has been successfully added to Mivi warranty claim online Process, stating, “Mivi warranty added successfully.
Conclusion:
In conclusion, how to claim mivi warranty online process involves several clear steps for a smooth experience. Begin by visiting the official Mivi website and navigating to the “Warranty Claim” section. Give exact and finish information on the guarantee structure, including your name, contact data, and email address. Verify your email with an OTP and specify where you purchased the Mivi product. Upload your invoice, ensuring it meets the required JPG format. Describe the product issue and include your contact information for efficient support. Take exact images and make a video that explains the issue. Affirm that the investigating didn’t determine your issue, then, at that point, recognize the accuracy of your data and continue. Upon submission, expect a confirmation message stating, “Mivi warranty added successfully.” This comprehensive process ensures efficient assistance and resolution of product concerns.
FAQs
Question 1. how to claim mivi warranty or How to initiate Mivi warranty claim?
Answer: To initiate a warranty claim with Mivi, visit the official Mivi website at https://miviindia.zohodesk.in/portal/en/home, navigate to the “Warranty Claim” section, and follow the provided instructions.
Question 2. What information do I need to submit a warranty claim?
Answer: You will typically need your product’s model and serial number, a copy of the purchase invoice, a clear description of the issue, and contact information.
Question 3. What if my product invoice is in PDF format, and I need to submit it in JPG format?
Answer: You can convert a PDF invoice to JPG using online converters or software tools before uploading it as part of your warranty claim submission.